Deploy a TOM to Heroku
Heroku is a PaaS which allows you to easily deploy web applications (like a TOM) to public servers without the need for managing any of the underlying infrastructure yourself.
Put simply: Heroku lets you make your TOM publicly available without needing to run servers, open firewall rules, manage domain names, etc. You simply push your code and Heroku will run your website for you.
The service has a free tier that should be more than adequate for TOMs handling 10s of users. However note that the free tier processing power is limited, so if you plan on doing lots of expensive processing on your data, you might want to look into alternatives.
Example code repository
There is an example code repository, TOMToolkit/herokutom, which contains the minimal setup required to run a TOM in Heroku. It is running at https://herokutom.herokuapp.com/.
Prerequisites
You should have a local TOM up and running following the instructions in the getting started guide.
You should be familiar with basic git commands.
Push your code to Github.
This guide will use the Github integration method for deploying to Heroku. This way, we can tell Heroku to redeploy your TOM each time we push changes to Github. Note: It’s possible to deploy to Heroku without using Github, but you’ll still need git.
If you haven’t already, push your TOM’s code to Github. If you are unfamiliar with Git and Github, there are many tutorials online for getting started, though the specifics are beyond the scope of this tutorial.
Once you have your code up on Github, you’re ready to move on to the next step.
Sign up for Heroku and create an app
First, start off by signing up for a Heroku account.
Once you have logged in to your account, Heroku will ask you to start a new project. Give it a name, but leave the pipeline stuff alone for now.
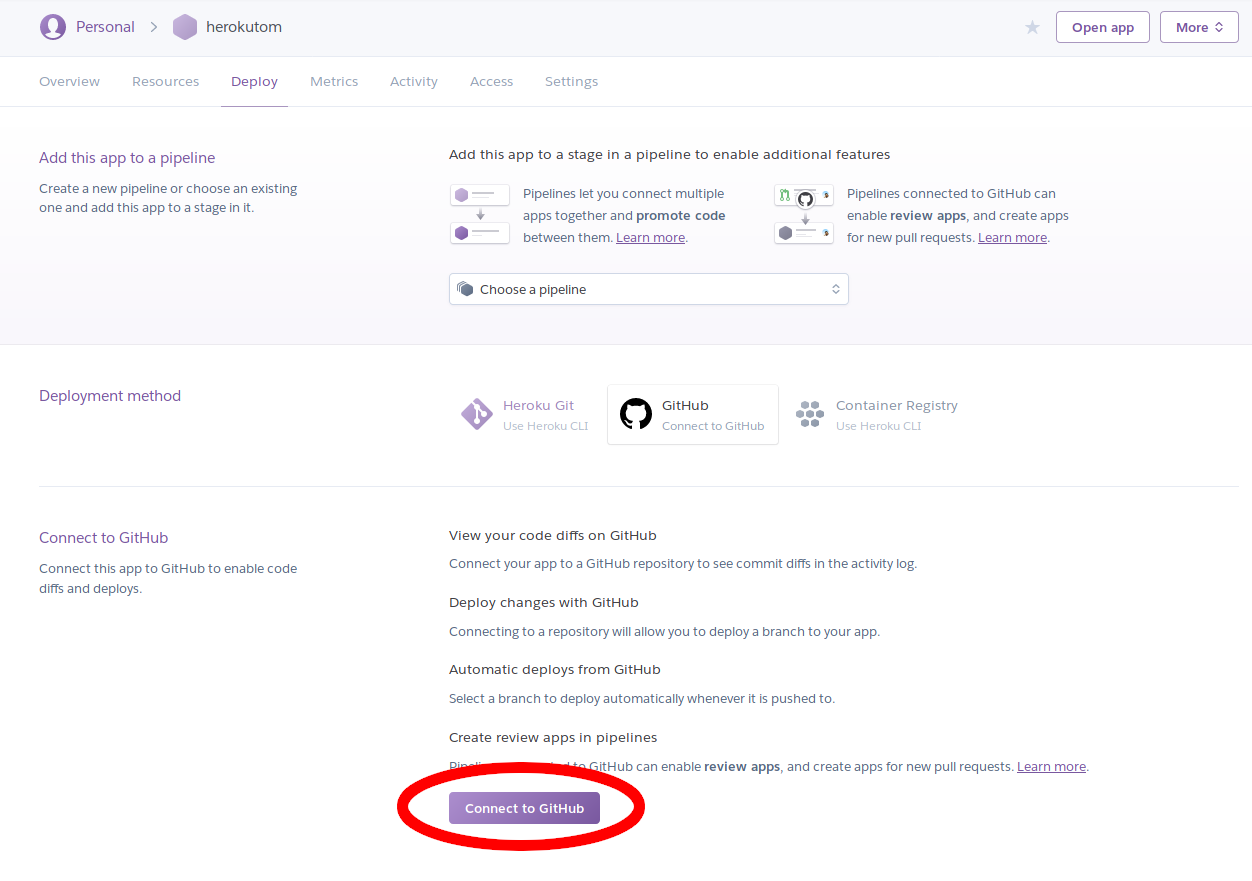
After creating an app you’ll be presented with a choice of Deployment methods. Choose Github and click the “Connect to Github” button.

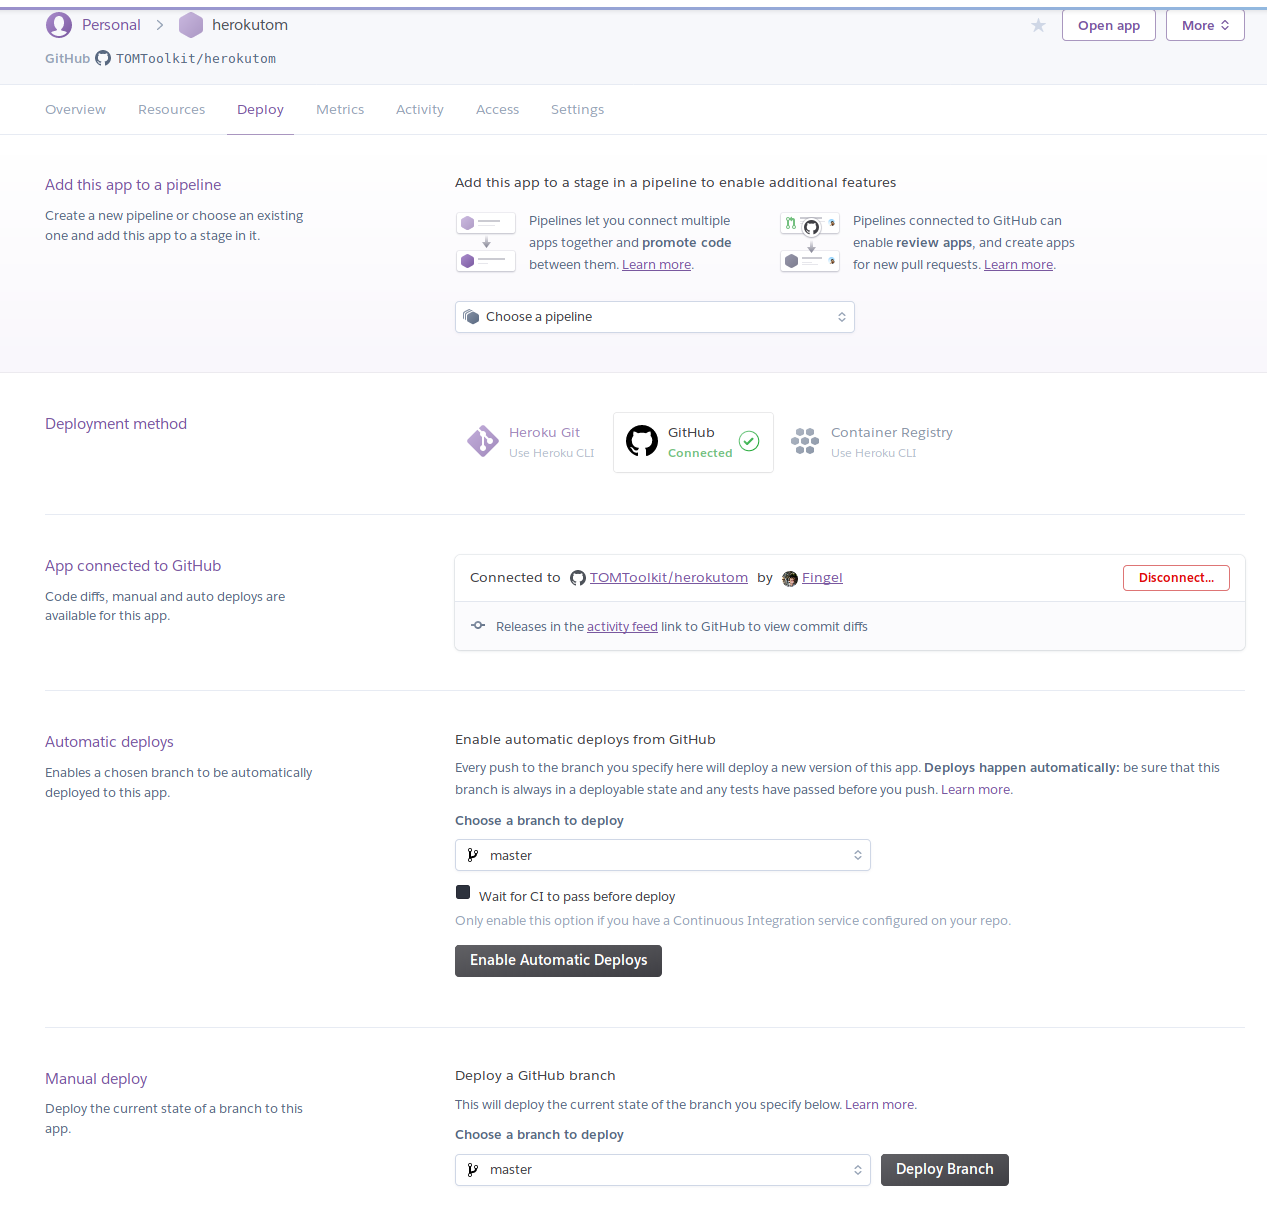
Once you have given Heroku access to your Github account and found your repo, your app should successfully be connected and your deployment dashboard should look like this:

That’s it for now, we’ll return to this page after we’ve made some modifications to our TOM to make it work with Heroku.
Make your TOM Heroku ready
There are a few additions we’ll need to make to our TOM before it can run in Heroku. If you’d like to follow Heroku’s guide directly, you can find it here.
Defining project dependencies with requirements.txt
If you haven’t already, define a requirements.txt file. This is a
file which is used to list dependencies of your project. Heroku expects
it so it knows which python packages it needs to install to run your
app. It should look something like this:
dataclasses
django
tomtoolkit
Let’s add 2 more lines: one for gunicorn, a
high performance http server and
django-heroku a utility
that helps autoconfigure Django projects for Heroku. Our
requirements.txt file should now look something like this:
dataclasses
django
tomtoolkit
gunicorn
django-heroku
You can make sure it works locally by installing your
requirements.txt dependencies with pip:
pip install -r requirements.txt
Settings.py changes
Now we need to edit our projects settings.py file to make it work
with Heroku. At the top of the file, we should import django_heroku:
import django_heroku
At the bottom of the file, we’ll call a method to autoconfigure our project:
django_heroku.settings(locals())
Adding a Procfile
Heroku requires the presence of a Procfile in your project. This
file tells Heroku how it is supposed to launch your app. Create a file
Procfile in the root of your project and add these contents:
release: python manage.py migrate --noinput
web: gunicorn mytom.wsgi
Make sure to change mytom.wsgi above to the actual name of your project!
Note on the release command: you might want to remove this line if
you’d like to have manual control over when your migrations are run in
the future. This is simply a convenience for now.
Push to Github and deploy
Once you have made the necessary modifications to settings.py above,
you should make a commit and push your code to Github.
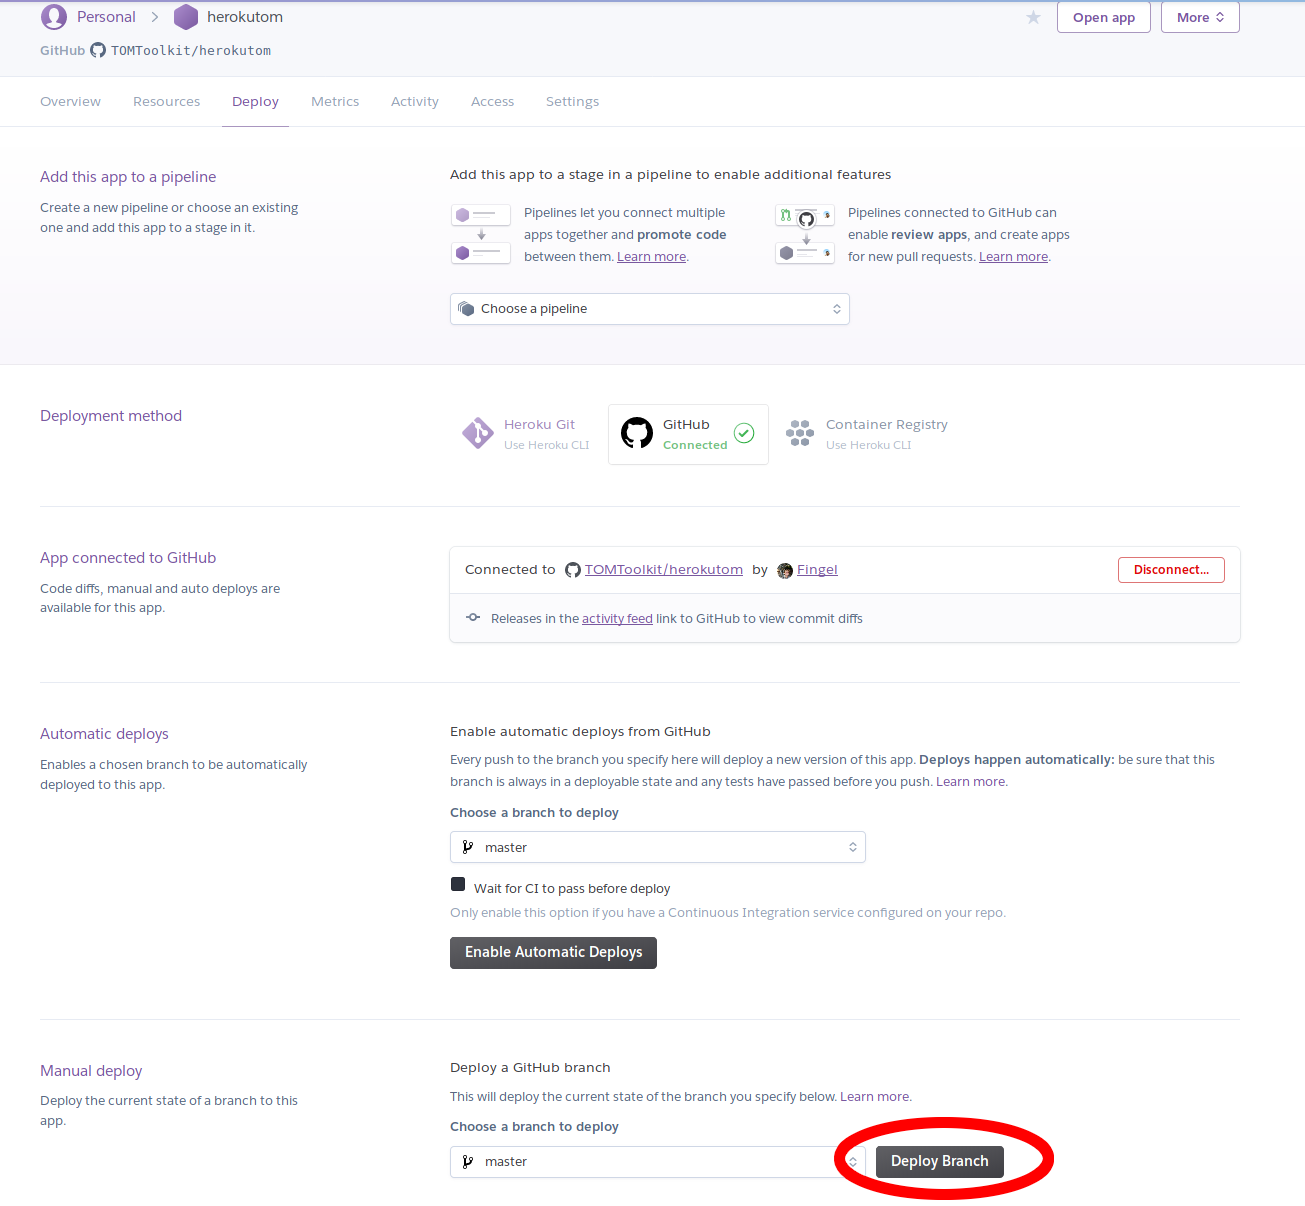
Now, navigate back to your app’s dashboard on Heroku. Under the deploy tab, you should see a section for Manual deploy, at the bottom, with a button “Deploy Branch”.

Select the branch to deploy (usually “master”) and click the “Deploy Branch” button. Heroku will begin launching your app. If all goes well, you should see something like this:

Your TOM should now be running at https://<>.herokuapp.com. Congratulations!
Next steps
You should spend some time familiarizing yourself with how Heroku works. As you may have noticed, there are many configuration options and workflows available. For example, just above the “Manual Deploy” section we used, there is a setting that allows Heroku to automatically deploy your app when you push code to Github.
Also note that Heroku has limitations, especially around storing data on disk. By default, Heroku only keeps files on disk for a maximum of 24 hours. If you plan on storing data (such as fits files or other supplementary data) you will have to use an external stoage service. In this case, you might want to read ahead on how to Use Amazon S3 to Store Data for a TOM.
