Creating an Alert Broker Module for the TOM Toolkit
This guide will walk you through how to create a custom alert broker module using the TOM toolkit.
At the end of this tutorial we will have a very simple module that connects to an “alert broker” (in this case a static json file) and allows us to ingest targets into our TOM.
You can follow this example to build an alert broker module to connect to a real alert broker.
Be sure you’ve followed the Getting Started guide before continuing onto this tutorial.
Tip
Read these first!
The following Python/Django concepts are used in this tutorial. While this tutorial does not assume familiarity with the concepts, you will likely find the tutorial easier to understand and build upon if you read these in advance.
TOM Alerts module
The TOM Alerts module is a Django app which provides the methods and classes needed to create a custom TOM alert broker module. A module may be created to ingest alerts of an arbitrary form from a remote source. The TOM Alerts module provides tools to transform these alerts into TOM-specific alerts to be used in the creation of TOM Targets.
Project Structure
After following the Getting Started guide, you will have a Django project directory of the form:
mytom
├── db.sqlite3
├── manage.py
└── mytom
    ├── __init__.py
    ├── settings.py
    ├── urls.py
    └── wsgi.py
Creating a Broker Module
In this example, we will create a broker named __MyBroker__.
Begin by creating a file my_broker.py, and placing it in the inner mytom/ directory
of the project (in the directory with settings.py). my_broker.py will contain the classes that define our custom
TOM Alert Broker Module.
Our custom broker module relies on the TOM Toolkit modules that were installed in the
Getting Started guide. Begin by editing my_broker.py
to import the necessary modules.
from tom_alerts.alerts import GenericQueryForm, GenericAlert, GenericBroker
from tom_alerts.models import BrokerQuery
from tom_targets.models import Target
In order to add custom forms to our broker module, we will also need Django’s forms module, as well the Python module requests, which will allow us to fetch some remote broker test data.
from django import forms
import requests
See Working with Django Forms and the Requests Official API Docs.
Test Data
In place of a remote broker, we’ve uploaded a sample JSON file to GitHub Gist.
For our my_broker.py module to use this data, we will set broker_url to it.
broker_url = 'https://gist.githubusercontent.com/mgdaily/f5dfb4047aaeb393bf1996f0823e1064/raw/5e6a6142ff77e7eb783892f1d1d01b13489032cc/example_broker_data.json'
Broker Forms
To define the query forms for our custom broker module, we’ll begin by creating class
MyBrokerForm inside my_broker.py, which inherits the tom_alert module’s
GenericQueryForm.
This will define the list of forms to be presented within the broker query. For our example, we’ll be querying simply on target name.
class MyBrokerForm(GenericQueryForm):
    target_name = forms.CharField(required=True)
Broker Class
To define our broker module, we’ll create the class MyBroker, also inside of my_broker.py.
Our broker class will encapsulate the logic for making queries to a remote alert broker,
retrieving and sanitizing data, and creating TOM alerts from it.
Begin by defining the class, its name and default form. In our case, the name
will simply be ‘MyBroker’, and the form will be MyBrokerForm - the form that we
just defined!
class MyBroker(GenericBroker):
    name = 'MyBroker'
    form = MyBrokerForm
Required Broker Class Methods
Each TOM alert broker module is required to have a base set of class methods. These methods enable the conversion of remote alert data into TOM-specific alerts and targets.
fetch_alerts Class Method
fetch_alerts is used to query the remote broker, and return both an iterator of results and any broker feedback received depending on the parameters passed into the query, so that any results or feedback (such as error messages) may be displayed on the query results page. In our case, fetch_alerts will only filter on name, but this can be easily extended to other query parameters.
@classmethod
def fetch_alerts(clazz, parameters):
    broker_feedback = ''
    response = requests.get(broker_url)
    response.raise_for_status()
    test_alerts = response.json()
    alert_list = []
    try:
        alert_list = [alert for alert in test_alerts if alert['name'] == parameters['target_name']]
    except KeyError:  # We want to catch error messages returned from the Broker and pass them on as feedback.
        broker_feedback = test_alerts
    return iter(alert_list), broker_feedback
Why an iterator? Because some alert brokers work by sending streams, not fully evaluated lists. This simple example broker could easily return a list (in fact we are coercing the list into an iterator!) but that would not work in the model where a broker is sending an unending stream of alerts.
Our implementation will get a response from our test broker source, check that our request was successful, and if so, return a iterator of alerts whose name field matches the name passed into the query. If the keyword ‘name’ isn’t present in the alert, we pass the results as feedback.
to_generic_alert Class Method
In order to standardize alerts and display them in a consistent manner,
the GenericAlert class has been defined within the tom_alerts library.
This broker method converts a remote alert into a TOM Toolkit GenericAlert.
@classmethod
def to_generic_alert(clazz, alert):
    return GenericAlert(
        timestamp=alert['timestamp'],
        url=broker_url,
        id=alert['id'],
        name=alert['name'],
        ra=alert['ra'],
        dec=alert['dec'],
        mag=alert['mag'],
        score=alert['score']
    )
In our case, the GenericAlert attributes match up almost directly with our test
data. How convenient! We’ll just go ahead and define the GenericAlert’s url
field as the broker_url we retrieved our test data from.
...
url=broker_url,
...
Other methods
fetch_alerts and to_generic_alert are the only methods required for your
broker module to function. Of course you are free to add any number of additional
methods or attributes to the module that you deem necessary.
Using Our New Alert Broker
Now that we’ve created our TOM alert broker, let’s hook it into our TOM so that we can ingest alerts and create targets.
The tom_alerts module will look in settings.py for a list of alert
broker classes, so we’ll need to add MyBroker to that list.
TOM_ALERT_CLASSES = [
    ...
    'tom_alerts.brokers.mars.MARSBroker',
    'mytom.my_broker.MyBroker',
    ...
]
Now, navigate to the top-level directory of your Django project,
where manage.py resides and run
./manage.py makemigrations
./manage.py migrate
./manage.py runserver
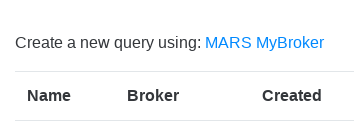
Navigate to http://127.0.0.1:8000/alerts/query/list/
You should now see ‘MyBroker’ listed as a broker! Clicking the link will bring you to the query page, where you can make a query to our sample dataset.

Making a Query
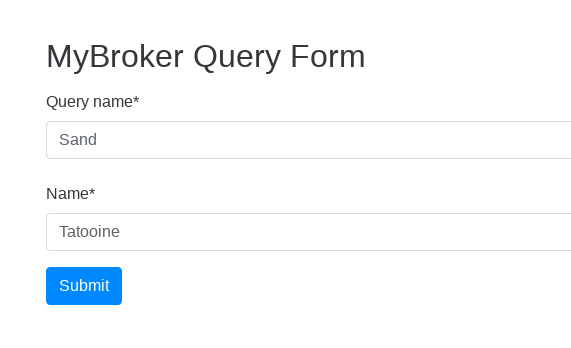
Since we’re only going to be filtering on the alert’s ‘target_name’ field, we’re only presented with that option. Name the query whatever you’d like, and we’ll check our remote data source for a target named ‘Tatooine’

Going back to http://127.0.0.1:8000/alerts/query/list/, our new query will appear. Click the ‘run’ button to run the query.

The query result will be presented.

To create a target from any query result, click the ‘create target’ button. To view the raw alert data, click the ‘view’ link.
Click here to view the full source code detailed in this example.
