Adding Custom Fields to Targets
Sometimes you’d like to store data for targets but the predefined fields that the TOM Toolkit provides aren’t enough. The TOM Toolkit allows you to define extra fields for your targets so you can associate different kinds of data with them. For example, you might be studying high redshift galaxies. In this case, it would make sense to be able to store the redshift of your targets. You could then do a search for targets with a redshift less than or greater than a particular value, or use the redshift value to make decisions in your science code.
Note: There is a performance hit when using extra fields. Try to use the built in fields whenever possible.
Enabling extra fields
To start, find the EXTRA_FIELDS definition in your settings.py:
# Define extra target fields here. Types can be any of "number", "string", "boolean" or "datetime"
# For example:
# EXTRA_FIELDS = [
#     {'name': 'redshift', 'type': 'number'},
#     {'name': 'discoverer', 'type': 'string'}
#     {'name': 'eligible', 'type': 'boolean'},
#     {'name': 'dicovery_date', 'type': 'datetime'}
# ]
EXTRA_FIELDS = []
We can define any number of extra fields in the array. Each item in the array
is a dictionary with two values: name and type. Name is simply what you would like
to name your field. Type is the datatype of the field and can be one of: number,
string, boolean or datetime. These types allow the TOM Toolkit to properly
store, filter and display these values elsewhere.
As an example, let’s change the setting to look like this:
 EXTRA_FIELDS = [
     {'name': 'redshift', 'type': 'number'},
 ]
This will make an extra field with the name “redshift” and a type of “number” available to add to our targets.
Using extra fields
Now if you go to the target creation page, you should see the new field available:

And if we go to our list of targets, we should see redshift as a field available to filter on:
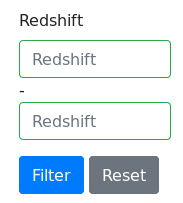
Extra fields with the number type allow filtering on range of values. The same
goes for fields with the datetime type. string types to a case insensitive
inclusive search, and boolean fields to a simple matching comparison.
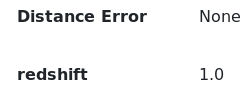
Of course, redshift does appear on our target’s display page as well:
To hide extra fields from the target page, we can set the “hidden” key (this doesn’t affect filtering and searching):
 EXTRA_FIELDS = [
     {'name': 'redshift', 'type': 'number', 'hidden': True},
 ]
And we can set a default value for an extra field by including a default key/value pair:
 EXTRA_FIELDS = [
     {'name': 'redshift', 'type': 'number', 'default': 0},
 ]
Displaying extra fields in templates
If we want to display the redshift in other places, we can use a template filter to do that. For example, we might want to display the redshift value in the target list table.
At the top of our template make sure to load targets_extras:
{% raw %}
 {% load targets_extras %}
{% endraw %}
Now we can use the target_extra_field filter wherever a target object is
available in the template context:
{% raw %}
 {{ target|target_extra_field:"redshift" }}
{% endraw %}
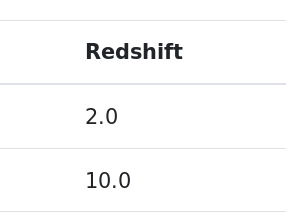
The result is the redshift value being printed on the template:
Working with extra fields programatically
If you’d like to update or save extra fields to your targets in code, there are a
few methods you can use. The simplest is to simply pass in a dictionary of extra data to your
target’s save() method using the extras keyword argument:
target = Target.objects.get(name='example')
target.save(extras={'foo': 42})
The example target above will now have an extra field “foo” with the value 42.
For more precise control, you can access TargetExtra models directly. To remove
an extra, for example:
target = Target.objects.get(name='example')
target_extra = target.targetextra_set.get(key='foo')
target_extra.delete()
The above deleted the target extra on a target with the key of “foo”.