Scripting your TOM with a Jupyter Notebook
The TOM provides a graphical interface to perform many tasks, but there are many tasks where writing code to interact with your TOM’s data and functions may be desirable. In this tutorial we will explore how to interact with a TOM with code, programatically, using a Jupyter notebook.
First install JupyterLab into your TOM’s virtualenv:
pip install jupyterlab
Then launch the notebook server:
./manage.py shell_plus --notebook
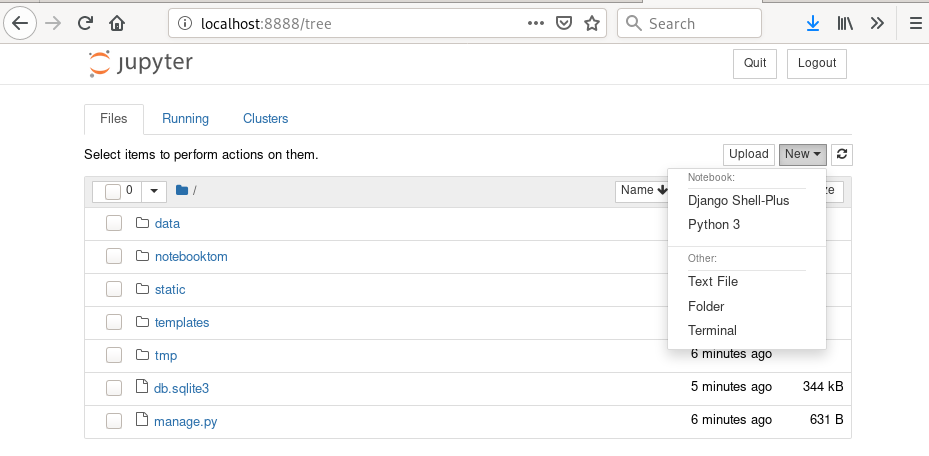
The notebook interface should open in your browser. Everything is the same as a
standard Jupyter Notebook, with the exception of an additional option under the
“new” menu. When creating a new notebook that interacts with your TOM, you should
use the Django Shell-Plus option instead of the regular Python 3 option. This will
open the notebook with the correct Django context loaded:
 new
new
Creat a new notebook. Now that it’s open, we can use it just like any other Notebook.
Creating Targets
We create targets by using the Target model and the create method. Let’s
create a target for M51 using the bare necessary information:
In [1]: from tom_targets.models import Target
   ...: t = Target.objects.create(name='m51', identifier='Messier 51', type='NON_SIDEREAL', ra=123.3, dec=23.3)
   ...: print(t)
   ...:
Target post save hook: Messier 51 created: True
Messier 51
Now we should have a target in our database for M51. We can fetch it now, or anytime later:
In [9]: target = Target.objects.get(name='m51')

In [10]: print(target)
Messier 51
We can access attributes of our target:
In [13]: target.ra
Out[13]: 123.3

In [14]: target.future_observations
Out[14]: []
And if we tire of it, we can delete it entirely:
In [15]: target.delete()
Out[15]:
(1,
 {'tom_targets.TargetExtra': 0,
  'tom_targets.TargetList_targets': 0,
  'tom_dataproducts.ReducedDatum': 0,
  'tom_targets.Target': 1})
See the django documentation on making queries for more examples of what can be done with objects in our database.
Submitting observations
Now that we have a target, we can submit an observation request using our notebook, too.
Let’s make some imports:
In [16]:
from tom_targets.models import Target
from tom_observations.facilities.lco import LCOFacility, LCOObservationForm
And since we are submitting to LCO, we will instantiate an LCO observation form:
In [17]:
form = LCOObservationForm({
    'name': 'Programmatic Observation',
    'proposal': 'LCOEngineering',
    'ipp_value': 1.05,
    'start': '2019-08-09T00:00:00',
    'end': '2019-08-10T00:00:00',
    'filter': 'R',
    'instrument_type': '1M0-SCICAM-SINISTRO',
    'exposure_count': 1,
    'exposure_time': 20,
    'max_airmass': 4.0,
    'observation_type': 'NORMAL',
    'target_id': target.id,
    'facility': 'LCO'
})
Is the form valid?
In [18]: form.valid()
Out[18]: true
Let’s submit the request:
In [19]: observation_ids = LCOFacility().submit_observation(form.observation_payload())
         print(observation_ids)
Out[19]: [123456789]
And create records for them:
In [20]:
for observation_id in observation_ids:
    record = ObservationRecord.objects.create(
        target=target,
        facility='LCO',
        parameters=form.serialize_parameters(),
        observation_id=observation_id
    )
    print(record)
Out[20]: M51 @ LCO
Now when we check our TOM interface, we should see that our target, M51, has a pending observation!
More possibilities
These are just a few examples of what’s possible using the TOM’s programmatic API. In fact, you have complete control over your data when using this api. The best way to learn what is possible is by browsing the source code of the TOM Toolkit project.